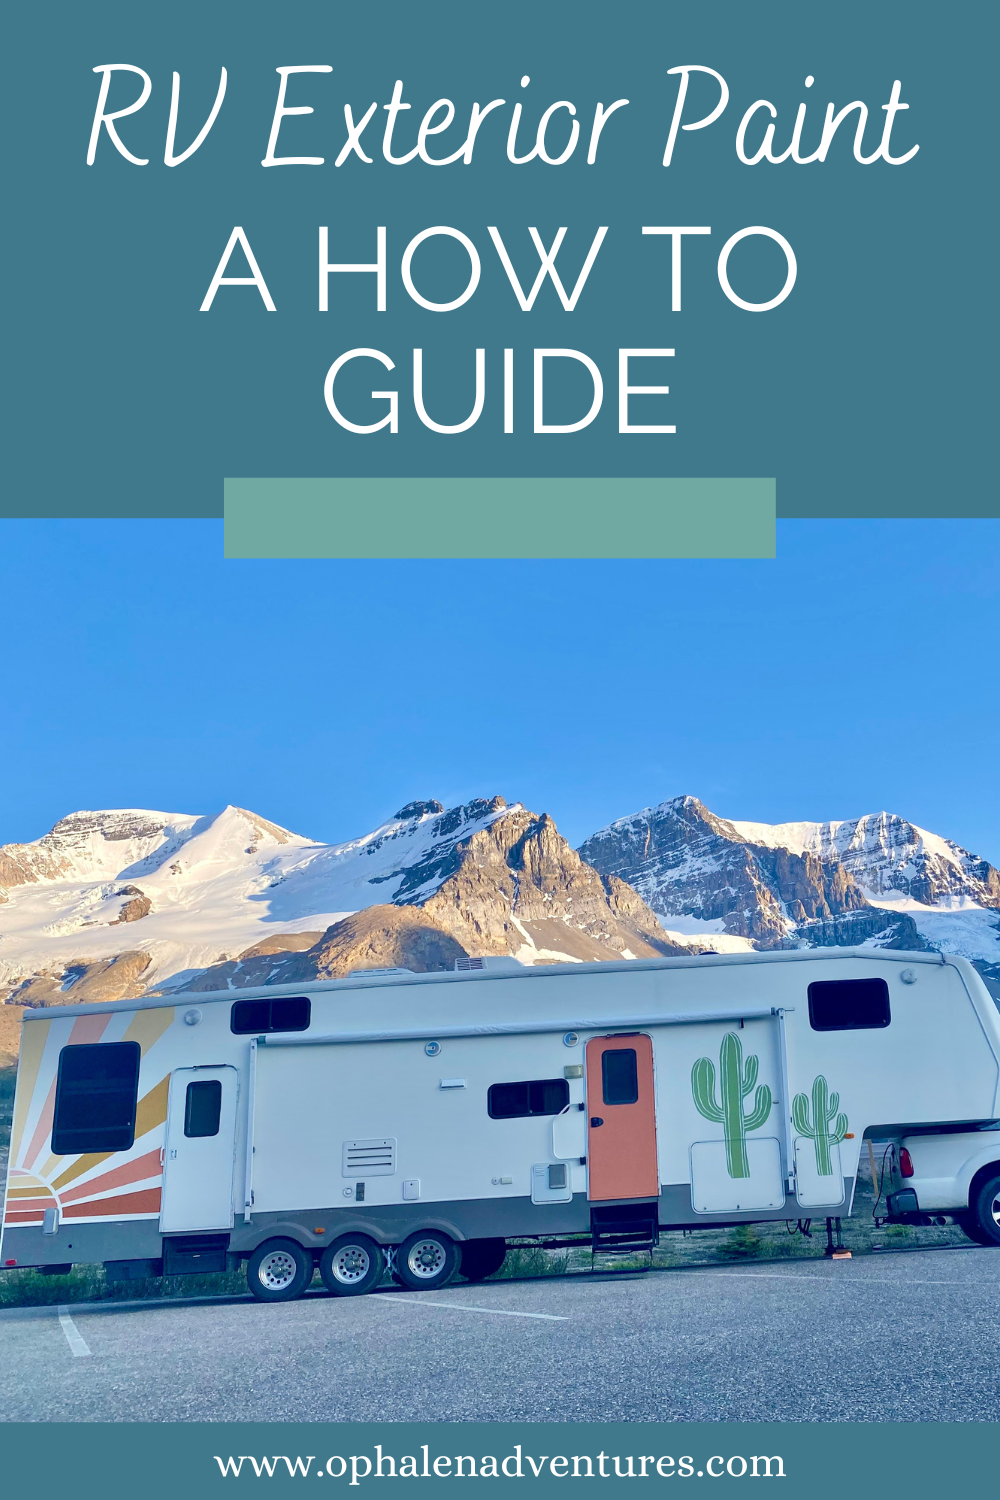

I did a lot of research into DIY RV exterior paint before finally committing to painting our fiberglass 5th wheel RV. We actually lived in the RV for almost a year before we painted the exterior, both because RV exterior paint prep is a BIG job and because I was worried about how it would turn out.
I’m happy to report that we all adore how it came out. I’m also really happy with the paint we chose and how we transferred the designs. So I’m here to share everything I learned with you today! Let’s get into it, and hopefully you’ll leave with some RV exterior paint ideas.
First, I feel like we need a before photo to really appreciate how worth it this was:

Sure came a long way, huh?
DIY RV Exterior Paint vs. Hiring Professional Painters
So the first choice in any paint job is deciding whether to DIY it or hire professional painters. As you all have probably noticed, I prefer DIYing everything I can. A professional RV exterior paint job can easily cost $10,000, which might make sense if you have a newer or very expensive rig whose value you want to maintain. For our 2007 Keystone Raptor, that kind of investment didn’t make sense.
You might be intimidated by painting on such a large scale, but I’m here to tell you that if you can paint a room and have a tall ladder, you can do this.
Choosing RV Exterior Paint
I also spent a lot of time hemming and hawing over which type of RV exterior paint to use. There are a lot of options. The professionals might use marine epoxy or automotive paint, which are the longest lasting options. The downsides to these are that they’re very expensive and come in limited colors.
Honestly, the lack of color options to suit my vision was my primary reason for choosing what I did: Behr latex exterior house paint. I was very worried about whether exterior house paint would hold up on a fiberglass RV exterior. We’re almost a year in (and we put our rig through a lot in Alaska!), and I’m happy to say that there are only two quarter-sized high-use spots that are chipping.
We used two gallons of paint for the base coat and several quarts or paint samples for the decorative colors. Did you know you can use those tiny paint sample pots for colors you only need a tiny bit of? Here are the RV exterior paint colors we used:

Not counting painting supplies, we spent about $300 on our RV exterior paint colors.
Tools for Painting your RV Exterior
A professional looking paint job requires good tools, so this is not a place you want to skimp. I considered renting or buying a paint sprayer, but ultimately decided to stick with paint rollers and brushes because I’m more comfortable painting that way. It was a good decision because the finish came out just fine the way we did it. Plus, we saved a couple of hundred dollars on the paint sprayer.
Here are the supplies we used:
- RV cleaner
- RV sealant
- 320 grit sandpaper
- Nice edging paint brushes designed for latex paint
- Paint rollers and handle
- Paint tray and liners (this paint is messy)
- Drop cloth
- Painters tape
- Decal remover wheels (we used 3) and hairdryer
- Projector (if you’re doing fancy RV exterior paint designs!)
- Level (for tracing straight lines)
Steps to Painting your RV Exterior
Here are the steps you’ll need to take to complete your RV exterior paint job. Don’t skimp on prep, it’s the most important part.
- Remove old decals if your rig has them. I won’t lie to you, this is by far the worst part. It took us probably 40 hours of heating decals that weren’t cracked with a hair dryer and peeling them off. Decals that were too sun baked needed to be buffed off with the decal remover wheels we bought.
- Clean the exterior thoroughly with your favorite RV cleaner.
- Replace any exterior fixtures that are due (we did our stove exhaust vent!). Re-caulk any seams that need it. Get your surface as even as possible.
- Lightly sand the entire exterior. Just the lightest of scuffs, don’t take layers off. Vacuum and wash away the dust carefully.
- Tape off any fixtures or trim with painters tape.
- Roll base color on and brush the edges. We didn’t need to prime separately because the paint we chose was 2-in-1.
- If you’re doing fun designs on top, set up the projector and trace the designs onto the RV. This can be tricky because it needs to be dark for you to see the projections. Go slow and come back to it the next day if you have to. Just don’t move the projector until you’re done!
- Paint over your beautiful designs! This is the most fun part.

How our Paint is Holding Up One Year Later
Okay, so how is it holding up? This was my biggest concern with this project, so I want to share real life photos! One year later, and I’m very happy with how the paint is holding up. There are two tiny spots with chips: the front door and the hinge of our most-used storage door. You can see the tiny chips on the door (it’s also VERY dirty from Alaska mud, but that’s washable!):

I really tortured myself trying to decide whether to paint our RV exterior, and I am SO glad that we did. I LOVE it, and we get so many compliments. The way we did it might stress out the RV exterior paint purists, but I would 100% do this again.
It really makes every picture of our home more joyful, right?

And I love that the outside finally matches the inside.
We spent six months renovating our whole 2007 fifth wheel from drab to fab. To see how the inside of the RV turned out, check out our complete RV Renovation Ideas post.
Interested in learning how to RV camp for totally free? Check out our Boondocking 101 guide!

Boondocking 101 Guide
This 10-page guide will assist RVers in learning the basics of boondocking, or camping off-grid! We share everything we’ve learned as a family living off-grid and boondocking in our RV.
Disclaimer: Product links in this blog post may be Affiliate links, and I will earn a small commission for each purchase made through these links at no extra cost to you. Affiliate income helps fund our family travel and allows me to keep creating inspiring family travel content for you. I so appreciate when you use my links to make purchases you would have made anyway.
For more RV renovation, here are some other posts you might like:


Follow our adventures on Instagram:


Comments
One response to “RV Exterior Paint: An Easy How To Guide”
Excellent post. I was checking continuously this blog and I
am impressed! Extremely useful information specifically the
last part 🙂 I care for such info a lot. I was seeking this particular info for a very long time.
Thank you and best of luck.